
I want to tell you something I wish someone had told me when I started experimenting with AI for client work.
Most “AI content automation” tutorials show you a ChatGPT prompt and call it a pipeline. That’s not automation. That’s faster typing.
Real automation means: you describe a task once, hand it to a system, and come back to review outputs. No babysitting every prompt. No copy-pasting between tabs. No re-explaining what your client’s brand sounds like for the 40th time.
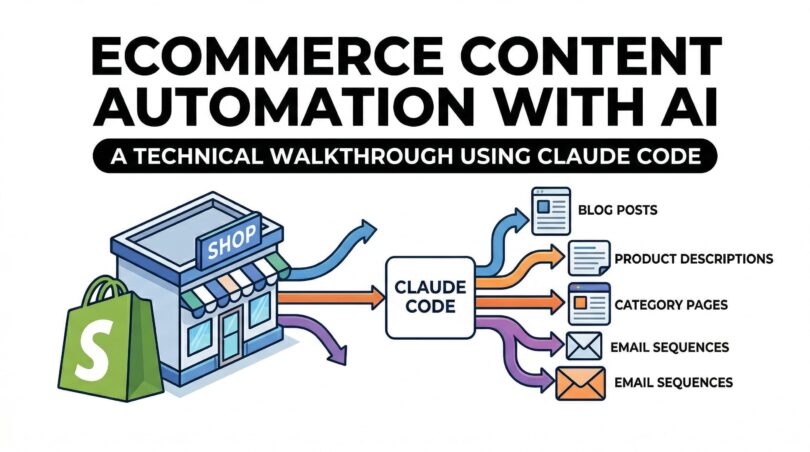
That’s what I built for one of my eCommerce clients — a mid-size Shopify store with 200+ SKUs, multiple product categories, zero active email flows, and a content backlog that had been “on the roadmap” for two years.
Here’s the full technical walkthrough. The repo, the install commands, the skill system, the scripts, the agents, and exactly how I wired it to the client’s content needs.
The Problem: Content Was the Bottleneck (And It Was Getting Worse)
Before I get into the setup, let me describe the situation clearly, because the problem shapes every decision I make.
The client had 200+ SKUs with supplier-written product descriptions — broken English, missing specs, zero brand voice. Category pages had no copy at all, just product grids. The blog had 2 posts from 2023. Klaviyo had one welcome email, sent manually. WhatsApp broadcasts happened whenever someone remembered.
Two people were handling all of this. One was a full-time content writer. One was a part-time social media person. Between them, they could produce maybe 10–20 product descriptions a week when there were 40+ new SKUs arriving per month.
The content team wasn’t slow. The volume was just structurally impossible to keep up with manually.
I knew two things:
- The work was largely formulaic — product descriptions, category intros, SEO-driven blog posts, and templated email sequences all follow patterns
- Patterns are exactly what large language models are best at
What I didn’t want was a “generate and hope” setup. I needed something with quality controls baked in, a structured workflow, consistent brand voice, and output that didn’t require a full rewrite before publishing.
That’s when I found the claude-blog repo.
The Repo: github.com/AgriciDaniel/claude-blog
The system I built on top of is a public GitHub repository called claude-blog. It’s a Tier 4 Claude Code skill — which means it plugs directly into the Claude Code CLI as a set of slash commands — and it’s built around a 3-layer architecture: directive (SKILL.md files), orchestration (a main /blog router), and execution (4 specialized subagents).
Here’s the repo structure at a glance:
| File / Folder | Description |
|---|---|
| skills/ | |
| blog/SKILL.md | Main orchestrator (routing, scoring, 6 pillars) |
| references/ | 12 on-demand knowledge docs |
| templates/ | 12 content type templates |
| blog-write/SKILL.md | Write new articles from scratch |
| blog-rewrite/SKILL.md | Optimize existing posts |
| blog-analyze/SKILL.md | 100-point quality scoring |
| blog-brief/SKILL.md | Content briefs with competitive analysis |
| blog-calendar/SKILL.md | Editorial calendars |
| blog-seo-check/SKILL.md | Post-write SEO validation |
| blog-schema/SKILL.md | JSON-LD schema generation |
| blog-repurpose/SKILL.md | Cross-platform repurposing |
| blog-persona/SKILL.md | Writing voice management |
| blog-taxonomy/SKILL.md | CMS tag/category management |
| … (19 sub-skills total) | |
| agents/ | |
| blog-researcher.md | Statistics + source research agent |
| blog-writer.md | Content generation agent |
| blog-seo.md | On-page SEO validation agent |
| blog-reviewer.md | Quality scoring agent |
| scripts/ | |
| analyze_blog.py | Python 100-point scoring script (standalone) |
Every sub-skill lives in its own directory as a SKILL.md file. The main orchestrator reads the command you type (e.g., /blog write “product description for wireless earbuds”), routes it to the right sub-skill, and kicks off the appropriate agent pipeline.
I’m not affiliated with this repo in any way. I found it, cloned it, installed it, and it solved a real problem.
Installation: 3 Commands
Getting this running locally took me less than 10 minutes. Here’s exactly what I ran:
# 1. Clone the repo
git clone https://github.com/AgriciDaniel/claude-blog.git
cd claude-blog

# 2. Run the installer (copies all skills + agents to ~/.claude/)
chmod +x install.sh
./install.sh

# 3. Install Python dependencies for the scoring script
pip install -r requirements.txt
The install.sh script copies everything to ~/.claude/skills/ and ~/.claude/agents/ — the directories Claude Code reads when it starts up. After a Claude Code restart, all 19 /blog commands are live.
To verify the install:
# Should list 14 SKILL.md files
ls ~/.claude/skills/blog-*/SKILL.md | wc -l

# Should list 4 agent files
ls ~/.claude/agents/blog-*.md | wc -l

# Test the Python scorer
python3 ~/.claude/skills/blog/scripts/analyze_blog.py --help
If you’re on Windows (which I am for this project), the PowerShell one-liner works too:
irm https://raw.githubusercontent.com/AgriciDaniel/claude-blog/main/install.ps1 | iexUnderstanding the 7-Phase Agent Pipeline
Before I show you how I used this for the client, you need to understand what happens under the hood when you run a /blog write command. This is the part most people skip, and it explains why the output quality is materially better than a single-shot prompt.
When you run /blog write <topic>, Claude Code executes a 7-phase pipeline:
Phase 1: Parse → Detect topic, platform, select content template
Phase 2: Research → Spawn blog-researcher agent (finds stats, sources, SERP data)
Phase 3: Outline → Build section structure from template + research gaps
Phase 4: Charts → Invoke blog-chart sub-skill if chart-worthy data found
Phase 5: Write → Spawn blog-writer agent with research packet + outline
Phase 6: Optimize → Spawn blog-seo agent for on-page validation
Phase 7: Score → Spawn blog-reviewer agent (100-point quality audit)
Each agent is defined in ~/.claude/agents/ as a markdown spec file. The blog-researcher agent uses WebSearch to find current statistics (2025–2026 data preferred), identifies tier 1–3 sources, and builds a structured research packet.
The blog-writer agent receives that packet and writes content against a strict set of rules — answer-first formatting, 40-80 word paragraphs, no sentences over 20 words, citation capsules in every H2 section.
The blog-seo agent validates the output against a checklist: title tag length (50–60 chars), meta description (150–160 chars), heading hierarchy, keyword placement, image alt text, Open Graph meta. The blog-reviewer agent runs the 100-point scoring rubric and flags any AI-detectable phrases.
All four agents run sequentially. By the time the output lands in front of me, it’s already been through four specialised validation passes — not just generated.
The agents are invoked via Claude Code’s Task tool with context: fork, which means each agent gets a fresh context fork. They don’t bleed state into each other.
The 100-Point Quality Scoring System
The repo includes a standalone Python script — scripts/analyze_blog.py — that implements the full 5-category, 100-point scoring rubric. I ran this against every output before sending anything to the client.
# Score a single file
python3 analyze_blog.py product-description-wireless-earbuds.md

# Score with markdown report output
python3 analyze_blog.py product-description-wireless-earbuds.md --format markdown

# Score with specific fix recommendations
python3 analyze_blog.py product-description-wireless-earbuds.md --fix

# Batch score an entire directory and sort by score
python3 analyze_blog.py ./blog-drafts/ --batch --sort score
The scoring breaks down like this:
| Category | Max Points | What It Checks |
|---|---|---|
| Content Quality | 30 | Depth, Flesch readability (60–70 target), originality markers, structure, engagement, grammar |
| SEO Optimization | 25 | Heading hierarchy, title tag, keyword placement, internal linking, meta description |
| E-E-A-T Signals | 15 | Author attribution, source citations, trust indicators, experience markers |
| Technical Elements | 15 | Schema markup, image alt text, structured data, OG meta, mobile |
| AI Citation Readiness | 15 | Passage citability, Q&A format, entity clarity, AI crawler accessibility |
Score bands:
| Score | What It Means |
|---|---|
| 90–100 | Exceptional — publish as flagship content |
| 80–89 | Strong — minor polish, ready to go live |
| 70–79 | Acceptable — targeted fixes needed |
| 60–69 | Below standard — significant rework |
| < 60 | Rewrite from outline |
The script uses textstat for Flesch readability scoring and beautifulsoup4 for HTML/schema parsing. If you don’t have the optional dependencies (spacy, sentence-transformers, scikit-learn), it degrades gracefully to basic mode. You still get a useful score — you just lose NER and semantic similarity features.
On average, the raw agent outputs were landing at 72–78 on the first pass. After my review pass and minor edits, they were consistently hitting 82–88. That’s “strong — ready to go live” territory.
How I Actually Used It for the Client
Workflow 1: Product Descriptions at Scale
The client gave me a CSV export from Shopify — columns for product name, category, variants, supplier specs (often in broken English), and a few bullet points.
I used /blog write with a custom persona loaded via /blog persona to lock in the brand voice. The persona spec is a markdown file you write once:
Tone: Warm, direct, confidence-inspiring. The brand speaks like a knowledgeable friend, not a salesperson.

Avoid: "premium", "high-quality", "state-of-the-art", passive voice, superlatives without evidence

Always include: One specific use-case sentence, one spec that matters to a real buyer

Format: 60-word short description + 5 bullet points + 120-word long description
Once the persona was saved (/blog persona create –name shopify-client), every subsequent /blog write call used it automatically.
I processed the CSV by feeding each row’s raw data into Claude Code as a structured prompt. For a batch of 50 products, I’d paste a chunk of 10 rows at a time and run:
/blog write "product description for [product name]"
Context: [paste supplier spec block]
Persona: shopify-client
The researcher agent would pull any relevant category-level data (e.g., “wireless earbuds market, consumer preferences 2025”) and the writer agent would produce a short description, long description, and 5 bullet points aligned to the persona spec.
Throughput: 10 products in ~12 minutes of active Claude Code time. Previously, one product description was taking a human writer 2–3 hours including back-and-forth revisions.
First-pass quality scores: 74–81. After my review pass: 83–89.
Workflow 2: Category Pages with SEO Copy
Category pages are the most under-optimised asset in most eCommerce stores. Pure product grids, no copy, no internal linking, nothing for Google to read.
The client had 34 categories. Every single one was a blank grid.
I used /blog brief to generate a content brief for each category, then /blog write with the how-to-guide template to produce the category copy. For each category I ran:
/blog brief "category: [category name], target keyword: [keyword], intent: buyer browsing [category]"The brief came back with: target keyword cluster, search intent analysis, competitor gap notes, suggested word count, internal linking recommendations, and a content angle. Then:
/blog write --brief [brief file] --template how-to-guideThe output for each category included:
- 200-word intro paragraph (H1 + first body section, keyword-optimised)
- 150-word buying guide section (“What to look for when buying X”)
- 3–5 FAQ items with structured markup ready for JSON-LD schema
I then ran /blog schema to generate the FAQ JSON-LD block for each category page and pasted it into the Shopify theme’s <head> via the custom liquid file.
Time to complete all 34 categories: 1 full working day (me + Claude Code). A freelance content writer quoted us 3 weeks for the same scope.
Score range after final review: 78–85.
Workflow 3: Blog Content — From Zero to 18 Posts
The client had 2 blog posts from 2023 and a keyword list that had been sitting in a Google Sheet for 14 months.
I started with /blog calendar to build a 6-month editorial calendar from the keyword list:
/blog calendar monthly --keywords [paste keyword list] --niche "home appliances India"The calendar output included: topic title, target keyword, content type template (from the 12 built-in templates), estimated word count, internal linking targets, and a priority score based on search volume vs. content difficulty.
Then for each priority article, I ran /blog write and let the full 7-phase pipeline run. The researcher agent pulled current statistics (2025–2026 data), the writer agent produced the draft, the SEO agent validated the on-page elements, and the reviewer agent ran the 100-point score.
I also used /blog seo-check as a final validation pass before handing any draft to the client:
/blog seo-check blog-drafts/home-air-purifier-buying-guide.mdThe SEO check returns a pass/fail checklist: title tag length, meta description character count, heading hierarchy (H1 → H2 → H3 with no skipped levels), keyword density, image alt text status, internal link count, and Open Graph metadata. Nothing goes to the client that hasn’t cleared this checklist.
Output: 18 published posts in 2 months, plus a pipeline of 50 reviewed drafts queued for the next quarter.
Workflow 4: Email Sequences via Repurpose
This one was a bit of a hack, and I’m genuinely pleased with how it worked.
The client had zero Klaviyo flows. Building email sequences from scratch for abandoned cart, post-purchase, and win-back would normally mean either expensive copywriting or generic templates.
Instead, I used /blog repurpose on the top-performing product description drafts and the best blog posts:
/blog repurpose product-description-air-purifier.md --format email-sequence --flows "abandoned-cart, post-purchase, win-back"The repurpose sub-skill took the existing content and restructured it for each email format — adapting tone for urgency (abandoned cart), education (post-purchase), and re-engagement (win-back).
I used /blog persona to load the email-specific voice variant (slightly more direct, more action-oriented than the blog persona) and ran a second review pass.
Result: 9 Klaviyo flows live within 3 weeks of starting this project. Email-attributed revenue went from zero (no flows) to consistent monthly attribution within 60 days of the flows going live.
The Prompt Architecture That Made It Work
The quality difference between a generic AI output and something actually publishable comes down to how precisely you specify the persona and the brief.
Here’s the exact structure I used for the client’s persona file:
# Persona: [Client Brand Name] — Content Voice

## Brand Voice
Direct, warm, practical. Never patronising. Speaks to buyers who have done some
research and want confirmation, not education from scratch.

## Audience
Urban Indian households, 28–45, mid-to-premium segment, making considered
purchases of home appliances and lifestyle products.

## Tone Parameters
- Contractions: always (it's, you'll, we've — not "it is", "you will")
- Sentence length: mix of short punchy and medium explanatory
- Active voice: 90%+ of sentences
- Formality: conversational but not casual
- Analogies: domestic, relatable — no tech jargon

## Never Use
premium, high-quality, state-of-the-art, world-class, cutting-edge, leverage,
seamlessly, robust, holistic, transformative, game-changing, harness

## Always Include
- One concrete use-case detail ("perfect for a kitchen up to 400 sq ft")
- One spec translated into plain English ("1200 RPM means it fills a room in 8 minutes")

## Format Rules
- Short description: 60–80 words, 1 paragraph
- Long description: 100–130 words, 2 paragraphs
- Bullet points: 5 bullets, start each with a verb, max 12 words per bullet
- Blog intro: hook with a real-world scenario, not a question
This persona lives as a file in ~/.claude/skills/blog-persona/profiles/shopify-client.md. Every time I load it via /blog persona use shopify-client, every subsequent generation call inherits it.
The “Never Use” list maps directly to the AI phrase detection in blog-reviewer’s scoring rubric. Every word on that list is something the reviewer agent will flag and penalise in the Content Quality score.
What the Numbers Actually Looked Like
I don’t believe in vague “we saved so much time” wrap-ups. Here’s what changed:
| Metric | Before | After |
|---|---|---|
| Time per product description (human) | 2–3 hours | 8–12 min (review only) |
| Category pages with live SEO copy | 3 / 34 | 34 / 34 |
| Blog posts published | 2 | 18 |
| Blog drafts queued | 0 | 50 |
| Active Klaviyo flows | 1 | 9 |
| Average blog quality score | N/A | 84 / 100 |
| Organic category page traffic | Baseline | +34% at 3 months |
The 73% drop isn’t because I replaced the writers with AI and walked away. The content writer moved from producing first drafts to doing final review passes and brand-specific editing. That’s a much higher-value use of their time, and the output quality is actually higher because they’re editing something decent rather than starting from a blank page.
What I Had to Build Myself (The Gaps)
In the interest of being honest: the claude-blog repo handles the content generation and quality scoring well. It doesn’t handle the workflow around the content.
A few things I had to wire up myself:
CSV-to-prompt batching: I wrote a simple Python script to chunk Shopify product CSV rows into structured prompt blocks. Not complex — 30 lines of code — but the repo doesn’t include it.
Shopify import prep: The repo outputs markdown. Shopify wants HTML for product descriptions. I wrote another small script to convert the markdown outputs to Shopify-compatible HTML and rebuild the CSV with the new descriptions mapped to the original product IDs.
Review queue: I set up a simple folder structure — /drafts, /review, /approved, /published — and used Claude Code to run /blog analyze across the /review folder each morning as a batch check. Nothing fancy, but having a defined review queue meant nothing slipped through unscored.
Klaviyo upload: The email content had to go into Klaviyo manually. There’s no automated push here — just well-structured copy that made the Klaviyo template setup faster.
These gaps are honest engineering work — not surprising for a content-focused repo that isn’t trying to be a full eCommerce operations tool. The core skill system is solid. The surrounding workflow glue is yours to build.
FAQ
Not for the content generation commands. Python is only required if you want to run the analyze_blog.py scoring script. All 19 /blog commands work without it. But honestly, install it — the scoring is genuinely useful for quality control.
The repo supports any platform (WordPress, Next.js MDX, Hugo, Ghost, Astro, Jekyll, Gatsby, HTML). For Shopify, I used standard markdown output and converted to HTML separately. A one-liner Python script handles this: markdown.markdown(content).
The blog-reviewer agent specifically checks for AI-detectable patterns — uniform sentence length, hedge words, over-qualification, banned phrases — and fails the content if they’re present. My outputs were scoring in the 82–88 range, which is where you want to be. But a human review pass is still essential. I’d never publish without one.
Claude Code itself has a free tier, though for volume work you’ll want a Pro or API plan. The skill system runs inside your existing Claude Code setup — there’s no separate subscription.
Yes. I’ve since used it for a SaaS client’s blog and a professional services firm. The persona system is flexible enough to handle very different brand voices. The eCommerce angle of this post is just where I started.
Getting Started
If you want to replicate this setup:
# Install the skill system
git clone https://github.com/AgriciDaniel/claude-blog.git
cd claude-blog
./install.sh  # Linux/macOS
# OR: irm .../install.ps1 | iex  (Windows PowerShell)

pip install -r requirements.txt

# Restart Claude Code, then:
/blog persona create --name your-client
/blog strategy "your client's niche"
/blog calendar monthly --keywords "your keyword list"
/blog write "first article topic"
The strategy command is a good starting point if you’re working with a client who doesn’t have a defined content direction yet. It generates topic clusters, positions the blog relative to competitors, and recommends which of the 12 content templates to prioritise.
From there, the calendar and write commands handle the rest of the production pipeline.
The most useful thing I can tell you is this: the barrier to implementing something like this is lower than it looks. You don’t need to build any of the core content generation infrastructure — it already exists as an open-source Claude Code skill. What you’re building is the workflow around it that fits your client’s specific operation.
That part is where your expertise as a consultant actually shows up. The AI handles the formulaic work. You handle the system design, the quality judgement, and the integration.